![3DISC_Logo_RGB_tiny.png]](https://help.3disc.com/hs-fs/hubfs/3DISC_Logo_RGB_tiny.png?height=50&name=3DISC_Logo_RGB_tiny.png)
3DiscClinic™ enables you to carry out fast and accurate Bite Alignment based on the scanned Maxillary and Mandibular arches.
Accessing Bite Alignment

To access Bite Alignment in the 3DiscClinic™ Scan Workflow:
- Click on the Bite Alignment icon in the left-hand Scan Workflow Menu, or navigate using the up ↑ | down ↓ keys on your keyboard.
The Workflow Menu will display steps that correspond to the Scan options selected in the Case Setup page.
 Workflow Menu steps in progress or completed are indicated by a green checkmark.
Carrying out an Automatic Bite Alignment
TIP 1.: For a better scanning experience, it is recommended to first position the scanner in the fully open patient mouth and then ask the patient to bite down.
TIP 2.: Take your time when scanning gingival regions!
The 3DiscClinic™ software calculates the 3D bite reconstruction based on gingival data. This makes it possible to successfully scan edentulous areas of the arch.
To ensure precision in calculating the patient's true bite alignment, auto mode now considers a region covering approximately four teeth from both the upper and lower sets.
-
1. When the patient's mouth is in occlusion, start scanning by pressing the Start/Stop button on the handpiece.
-
2. Place the scanner tip flat against the teeth of the molar/pre-molar region in occlusion, and scan a tooth and 1cm of mandibular gingiva
- Angle the scanner tip to take in as much gingiva as possible.
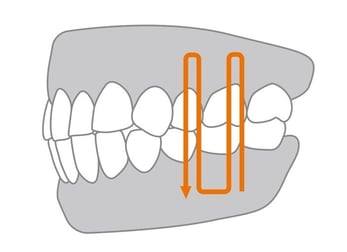
- 3. Pause 3-4 seconds on the mandibular gingiva, and move the scanner tip slowly along the gingiva for 2-3cm.
-
4. Scan up from the mandibular to maxillary gingiva.
- Angle the scanner tip to take in as much gingiva as possible.
-
5. Pause 3-4 seconds on the maxillary gingiva, and again move the scanner tip slowly along the gingiva for 2-3cm.
-
6. Scan down from the maxillary gingiva to the mandibular gingiva.
- Angle the scanner tip to take in as much gingiva as possible.
-
7. Repeat for adjacent tooth as necessary…
Auto-locking of bite scan
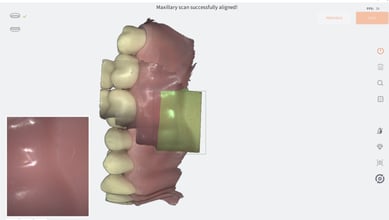
Once the software recognizes the scanned bite segment:
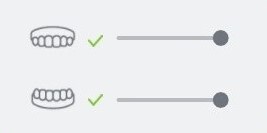
- A sound signal is emitted.
- The scan automatically locks.
- The initial scanned arch is overlayed on the segment.
 A green checkmark displays in the top-left of the screen, indicating you have finished scanning that segment.
-
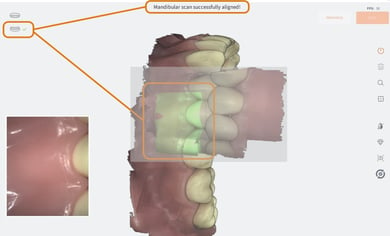
8. Continue scanning until the second arch is registered.
Again:
- A sound signal is emitted.
- The scan automatically locks.
- The initial scanned arch is overlayed on the segment.
 And a green checkmark displays in the top-left of the screen, indicating you have finished scanning that segment.
-
9. You will be invited to repeat the bite segment scan for the opposing side…
Using audio-guidance
The following audio-guidance sounds are available when scanning the bite segments:
- One sound for upper arch when registered
- One sound for lower arch when registered
- One sound for both and with sufficient data ( just before/after user stops scanning)
Audio-guidance options can be configured in 3DiscClinic™ Sound Settings.
For more information, go to: Sound Settings
Preservation of bite information
If you choose to modify an arch after acquiring the bite, a prompt message will asking if you would like to keep or reset the existing bite.
This is an enhancement compared to versions 3.7 and earlier, where editing either of the jaw scans would cause the automatic reset of the already registered bite.