Using Scan Tools
When in the 3DiscClinic™ Scan Workflow the following tools are available:
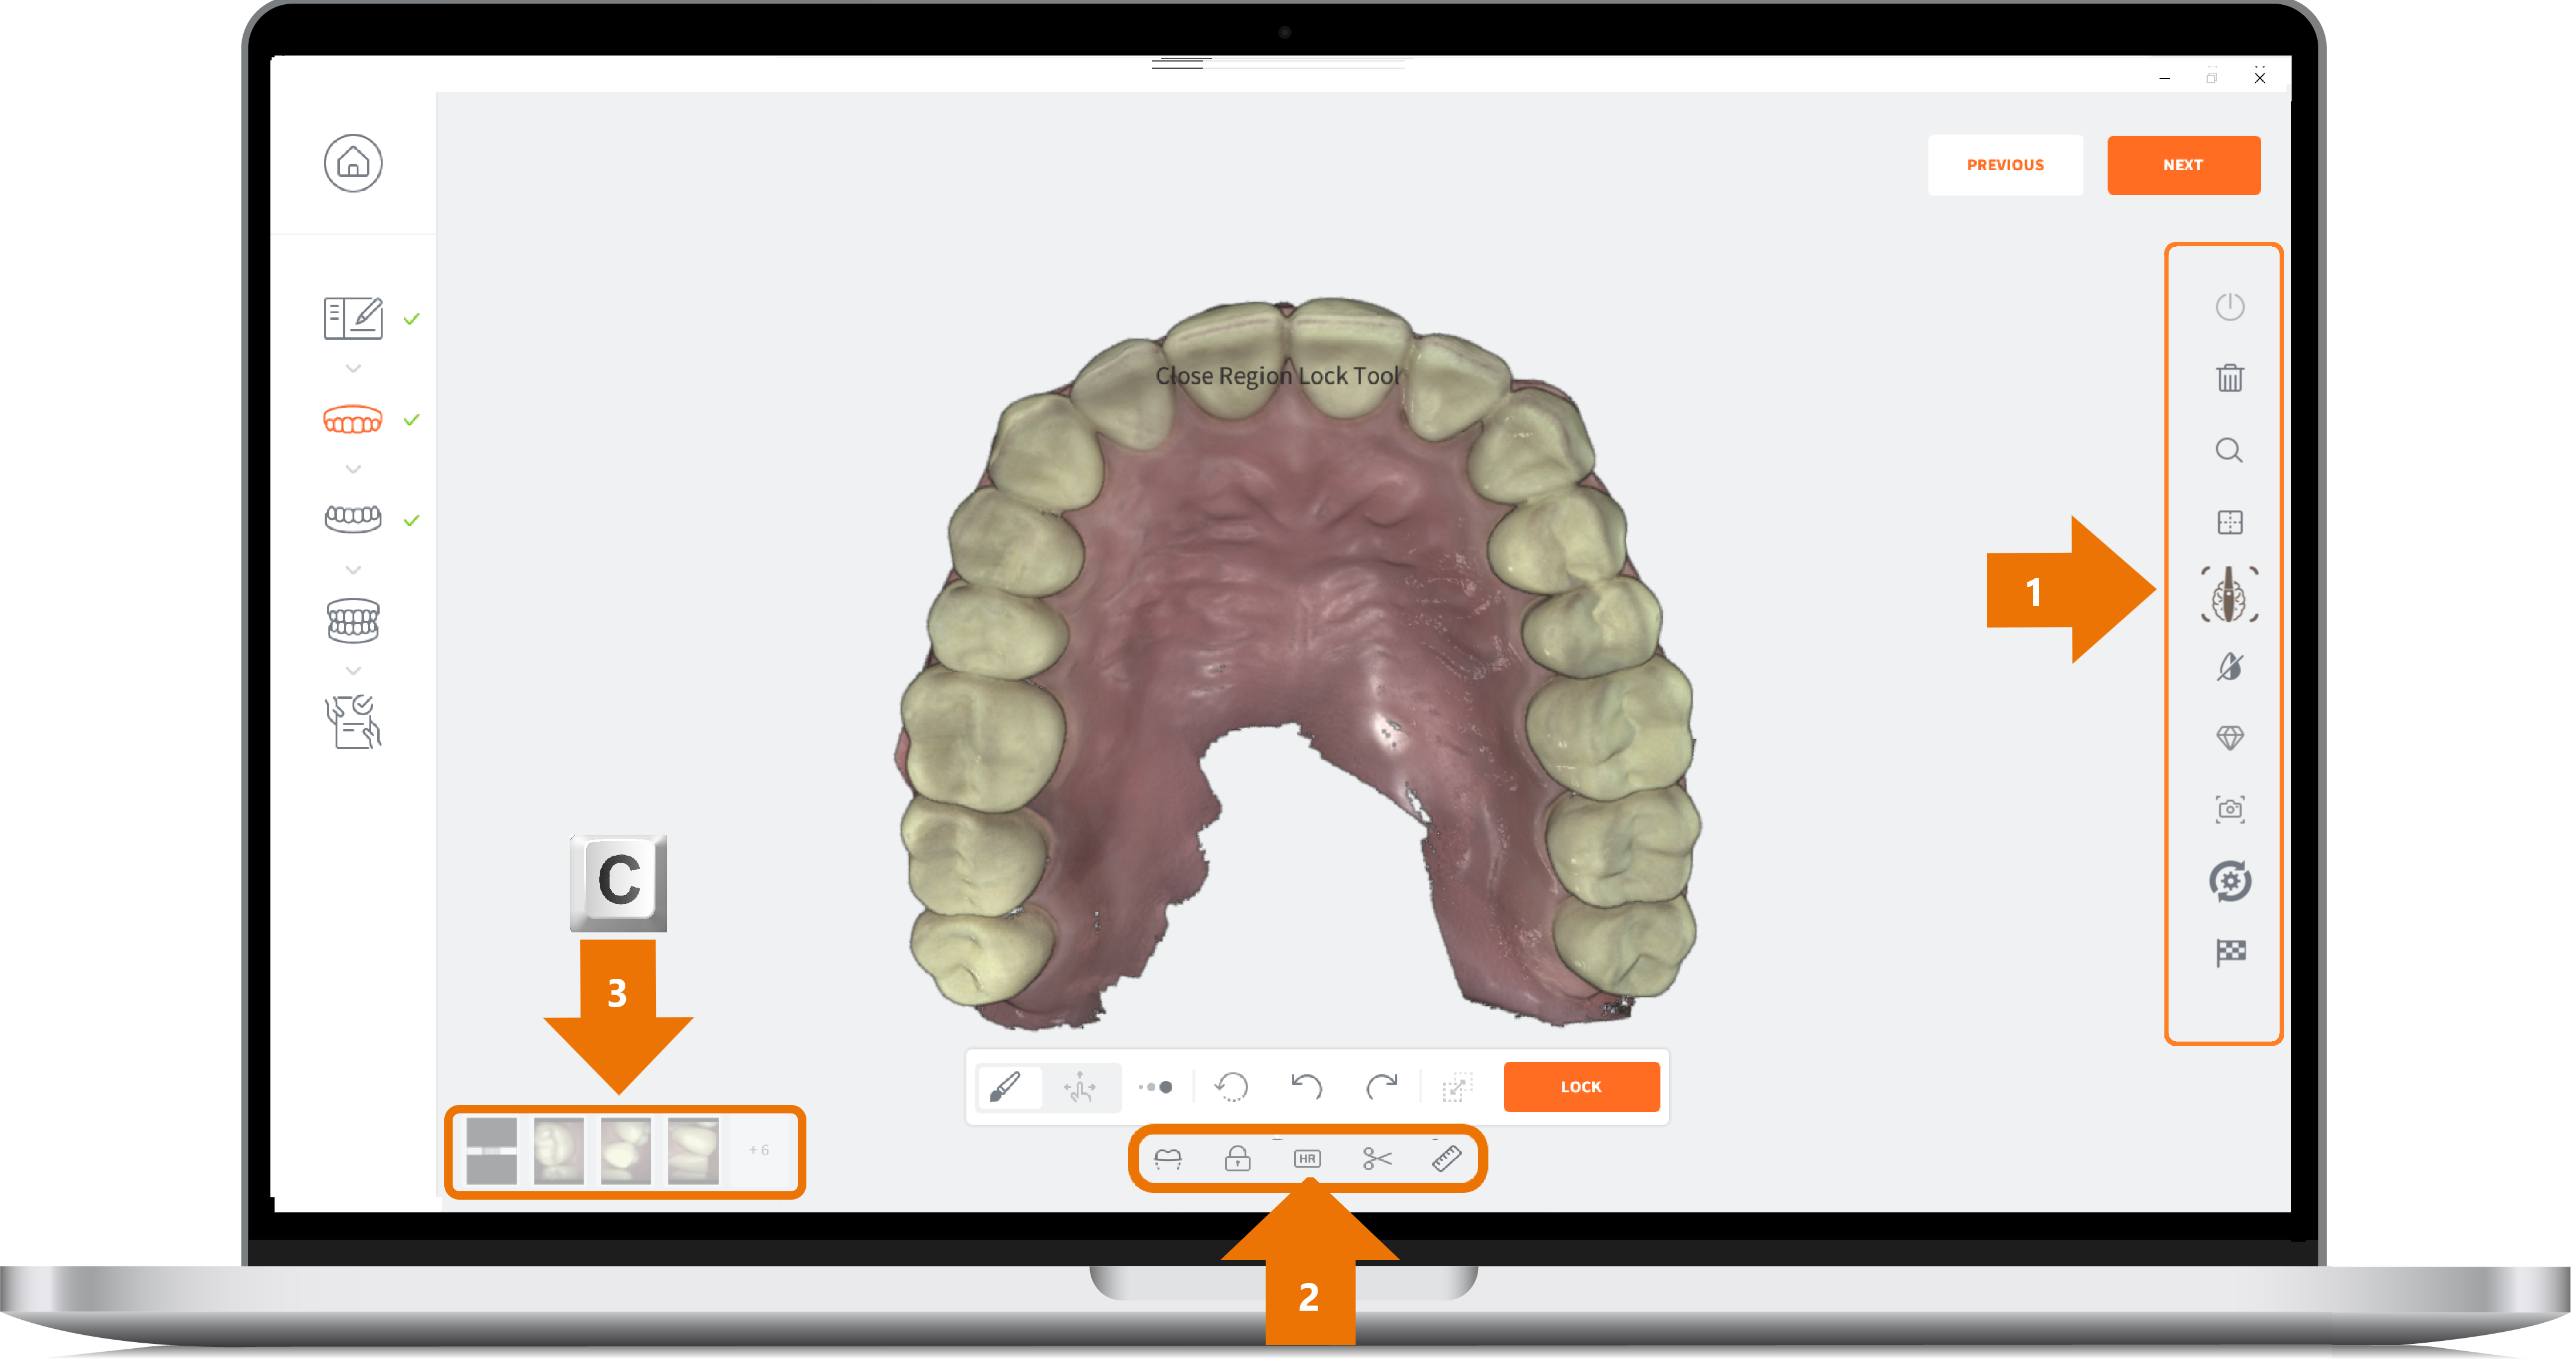
- 1. The Scan Tools Menu: located on the right-hand side of the screen.
- 2. Live Scan Tools: displayed below the digital 3D model.
- 3. 2D Live Screenshots of inside the patient mouth: displayed in the bottom left-hand of the screen (press C) or long press 1 second the button during the scan.
The Scan Tools Menu
| Icon | Scan Tool | Description |
|---|---|---|
 |
Start Scan | START/STOP/PAUSE the scan. |
| Reset Scan | Reset will delete the current scan step and associated files. | |
| Adjust Zoom level | Change the ZOOM level of the digital 3D model. | |
| Reset VIEWPORT | Re-center the digital 3D model on the screen. | |
| Enable Fly-AI | When activated essential soft tissue is preserved while unnecessary soft tissue and foreign objects are not integrated into the 3D model. | |
| Disable/Enable Captured Color | Toggle between color/grayscale display | |
| Quality Map | The Quality Map feature enables the user to assess in real-time if enough data was collected in the area of interest. | |
| Live View Screenshot | Take a Live View screenshot during the scan simply by pressing the C key or clicking on the Screenshot icon. |