Using the Margin Line Tool
![]()
The Margin Line Tool enables you to trace margin lines on 3D models, in order to ensure the accuracy of restorations ordered from the lab.
To trace a Margin Line, in the Finalization Page:
- 1. In the Review Page, click on the icon of the Margin Line Tool.


-
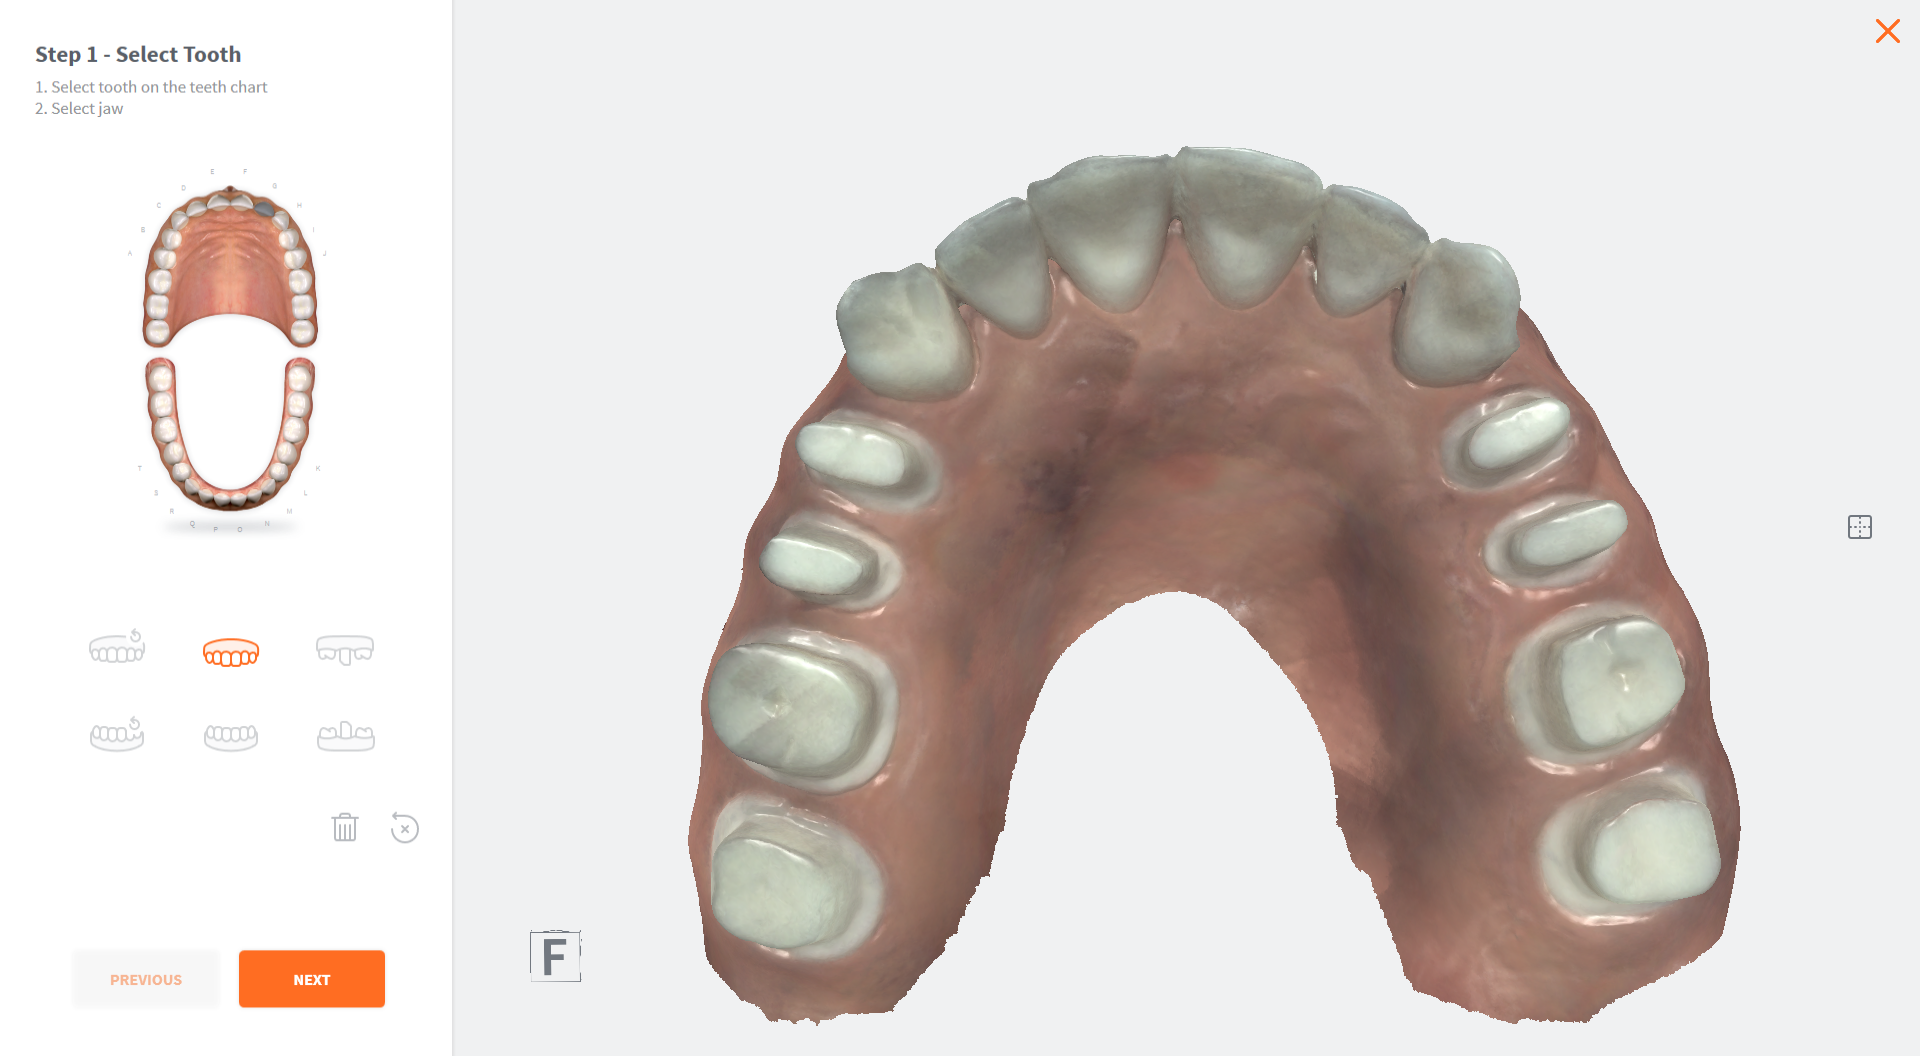
This opens the Margin Line Tool: Step 1 - Select Tooth
-
2. Click on the maxillary or mandibular icon to display the arch.
-
3.Click to select a tooth for which a restoration has been added.
-
4. ClickNEXT
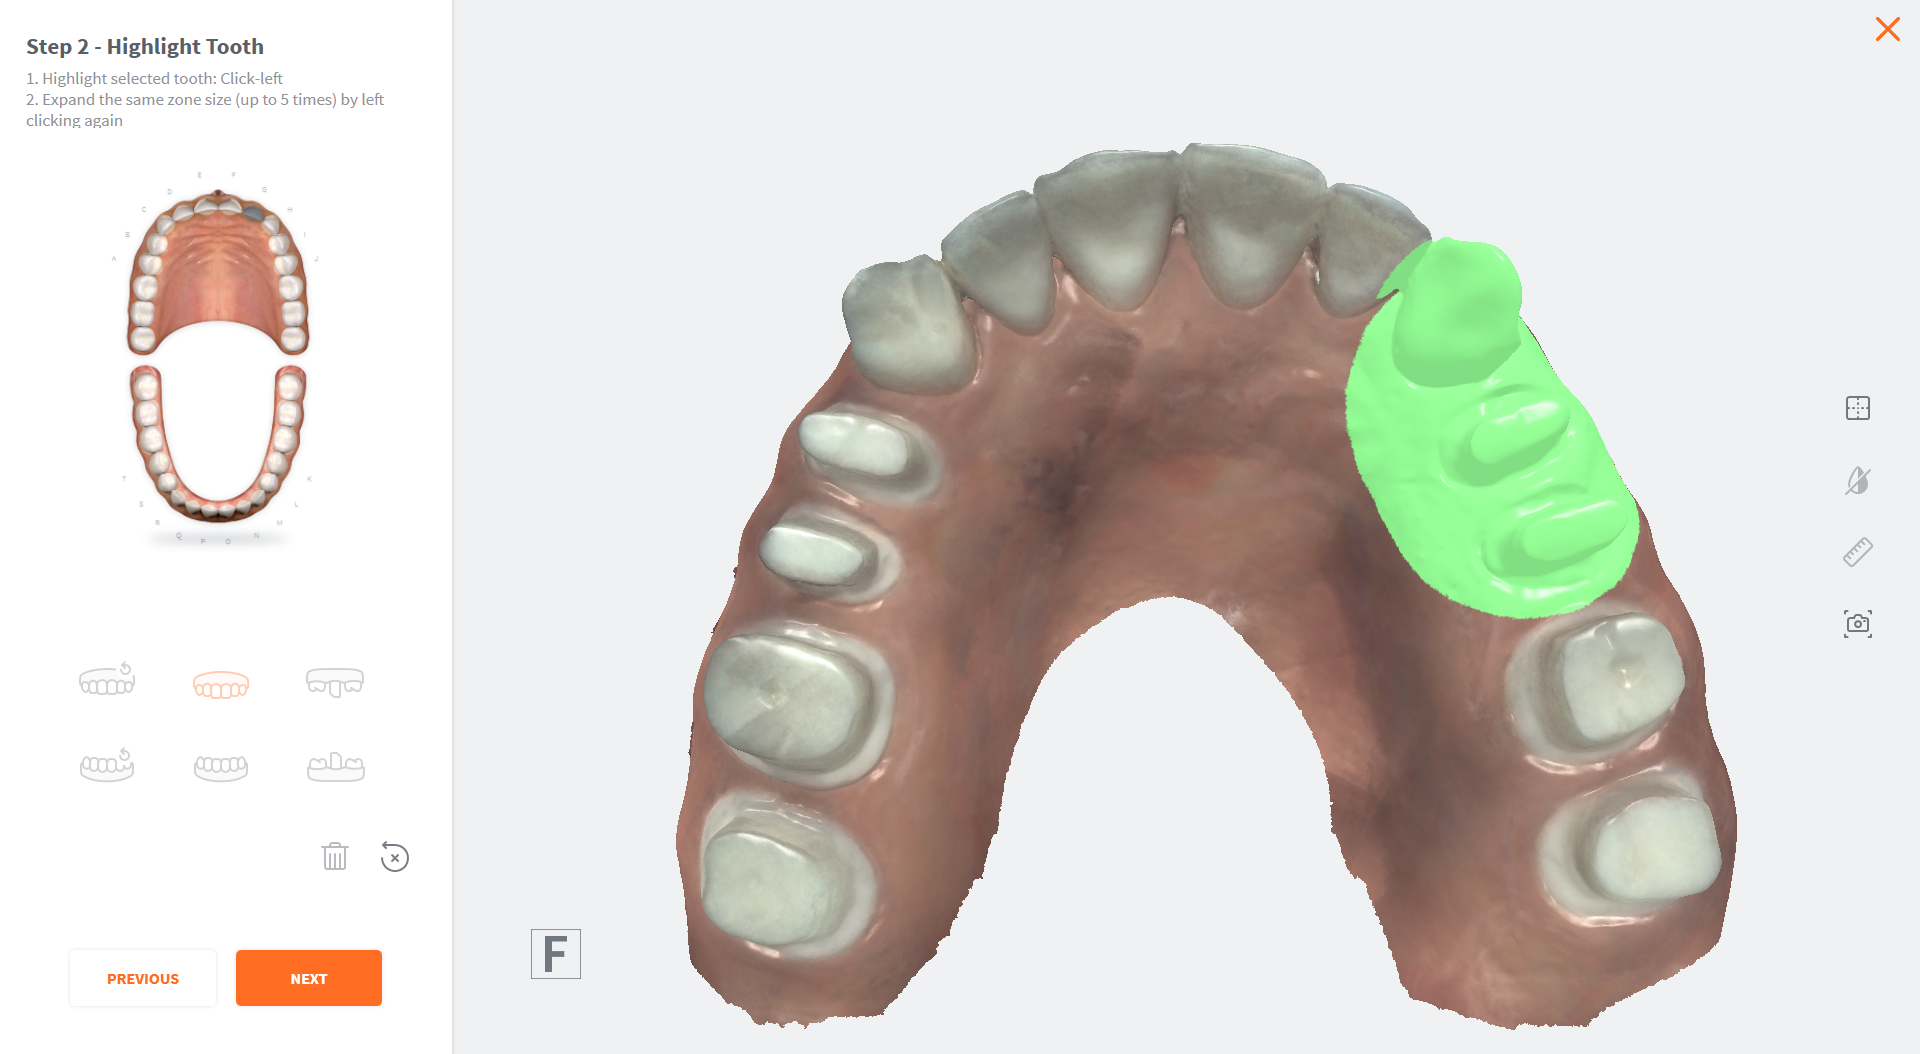
- This opens the Margin Line Tool: Step 2 - Highlight Tooth
-
5. Click-left on the tooth to select a region.
-
6. Click again (up to 5 times) to expand the selected region.
-
7. Click NEXT
-
This opens the Margin Line Tool: Step 3 - Draw Margin Line
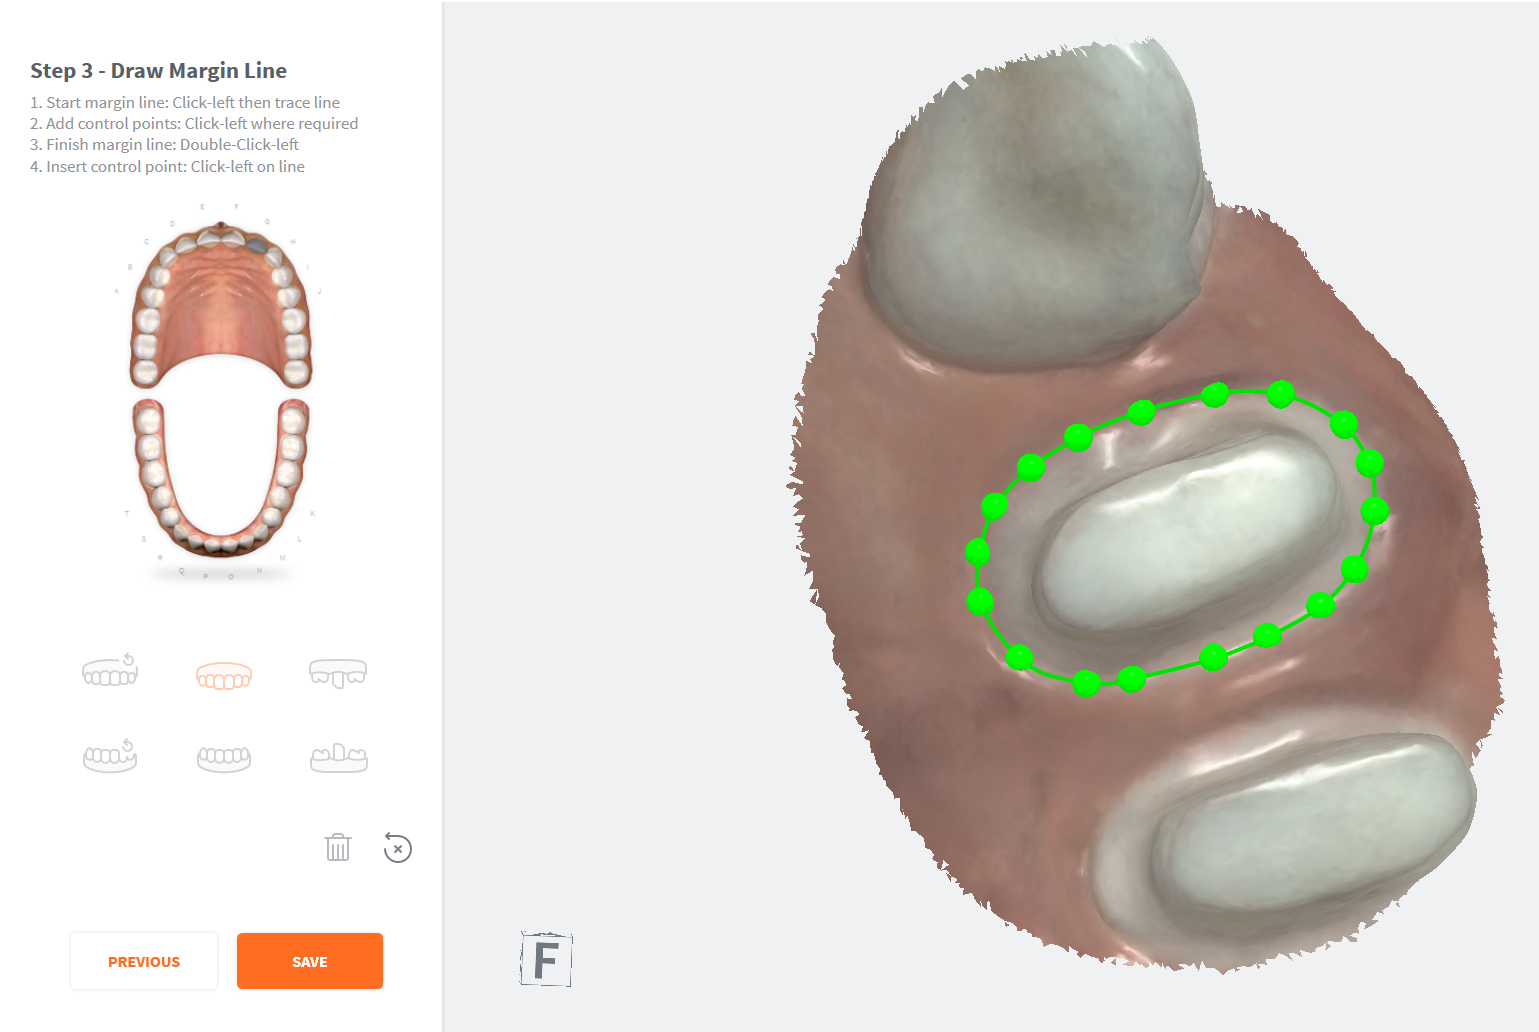
- 8. Draw a Margin Line as follows:
- To start margin line: Click-left then trace line
- To reposition 3D Model while drawing: Click-left + drag
- To insert a new control point: Click-left on line
-
To complete the margin line: Double-Click-left
-
9. Click SAVE
-
10. Click X to exit the Margin Line tool.
-
11. Click X again to exit the Inspection Page.
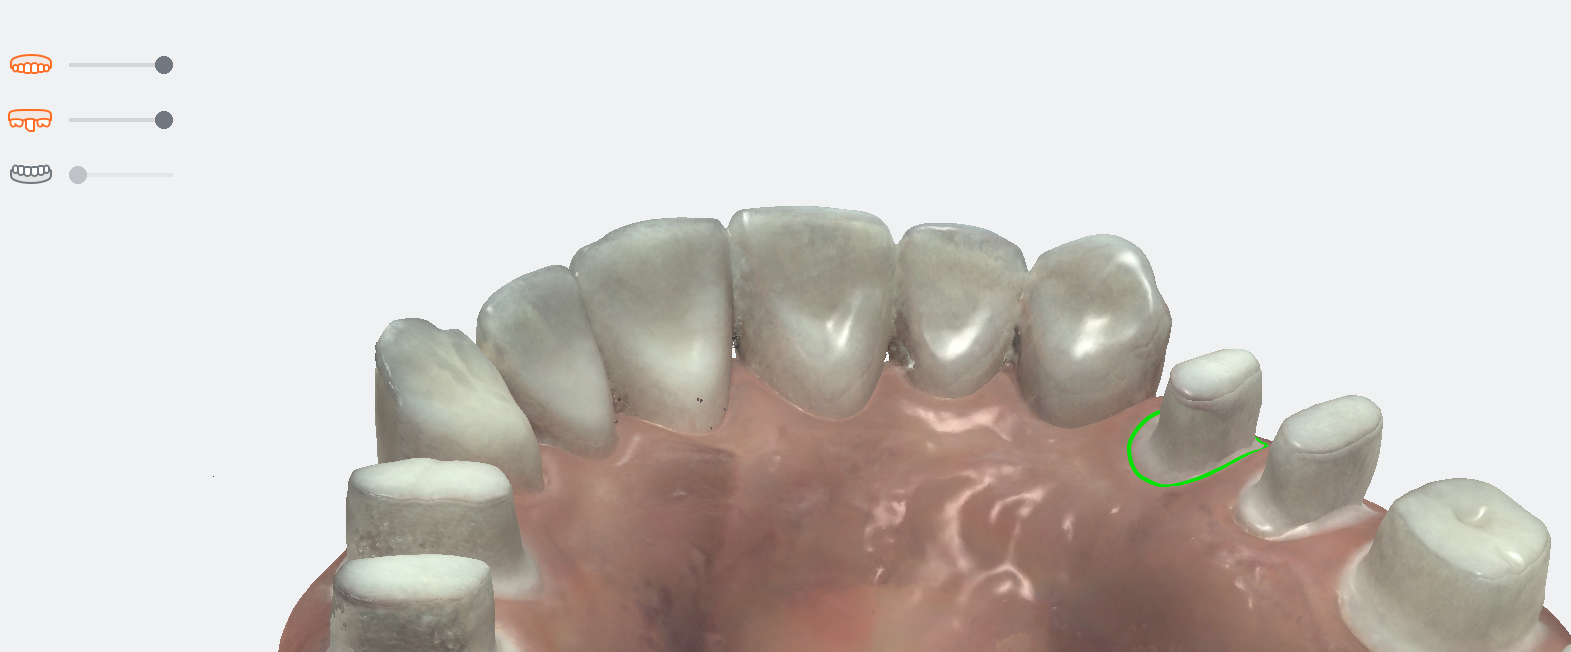
The Margin Line can be viewed in the 3D Models tab of the Case Review page.

Modifying a Margin Line
To modify a Margin Line:
- 1. Click to expand the 3D Models tab to full-screen.
-
2. Click on the Margin Line icon in the right-hand Case Review Tools menu.
-
3. Click to select the tooth for which a Margin Line has been drawn.
-
4. Click EDIT
-
To Delete the Margin Line, clickDELETE
-
5. Follow the Margin Line procedure described above.
Available Complementary Tools:
| Icon | Case Review Tool | Description |
|---|---|---|
| Reset Viewport | Re-center the digital 3D model on the screen. | |
| Choose Color Display | Choose between natural captured color, grayscale and bi-color display of digital 3D Model. | |
| Measurement | Tool enabling you to take measurements on the digital 3D Model. | |
| Screenshot | Take screenshots of the 3D model as you edit it. |