3DiscClinic™ Model Studio

Using the Model Closing Tool
The 3DiscClinic™ Model Studio enables you to prepare 3D models for printing.
To access the Model Studio Model Closing tool, in the Finalization Page:
-
2. In the Review Page, click on the icon of the Model Studio.

-
This will open the Model Studio and invite you to prepare the digital 3D model for printing (also referred to as closing the model).
To Finalize the 3D Model:
- Select Jaws for model occlusion.

- Adjust vertical and horizontal planes by clicking on the positioning icons in the left-hand menu.
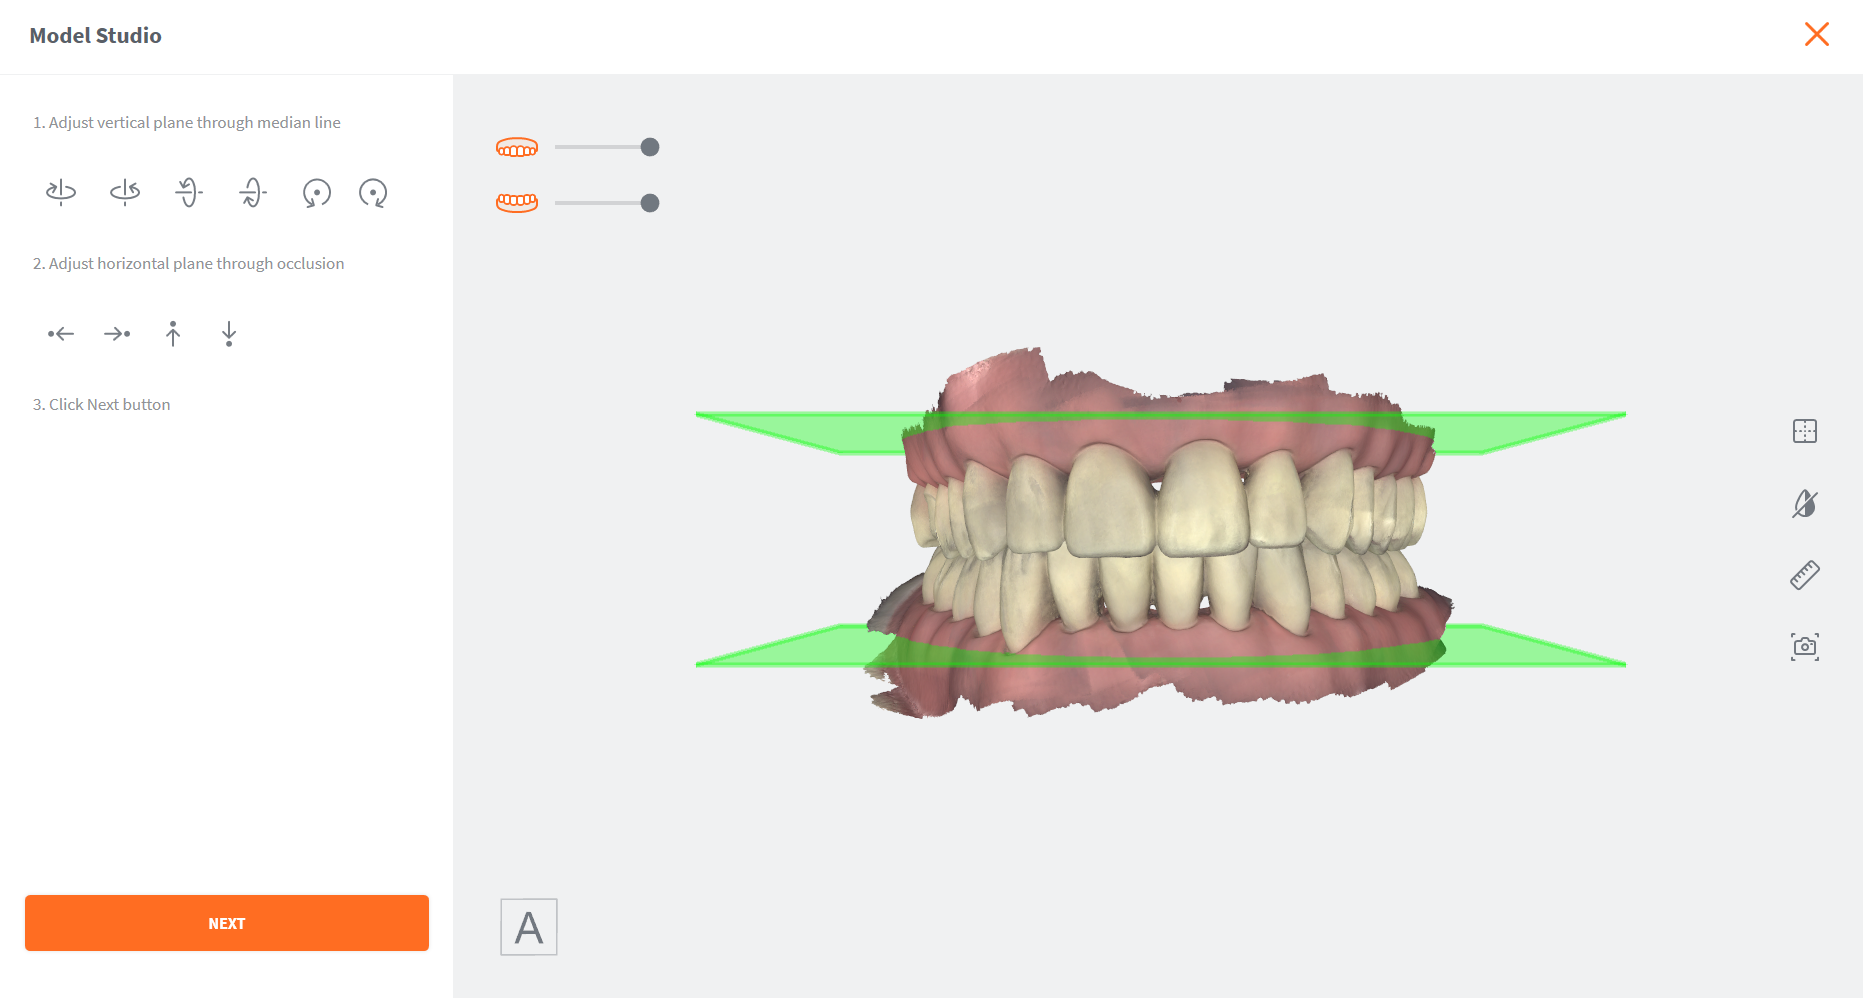
- Click NEXT
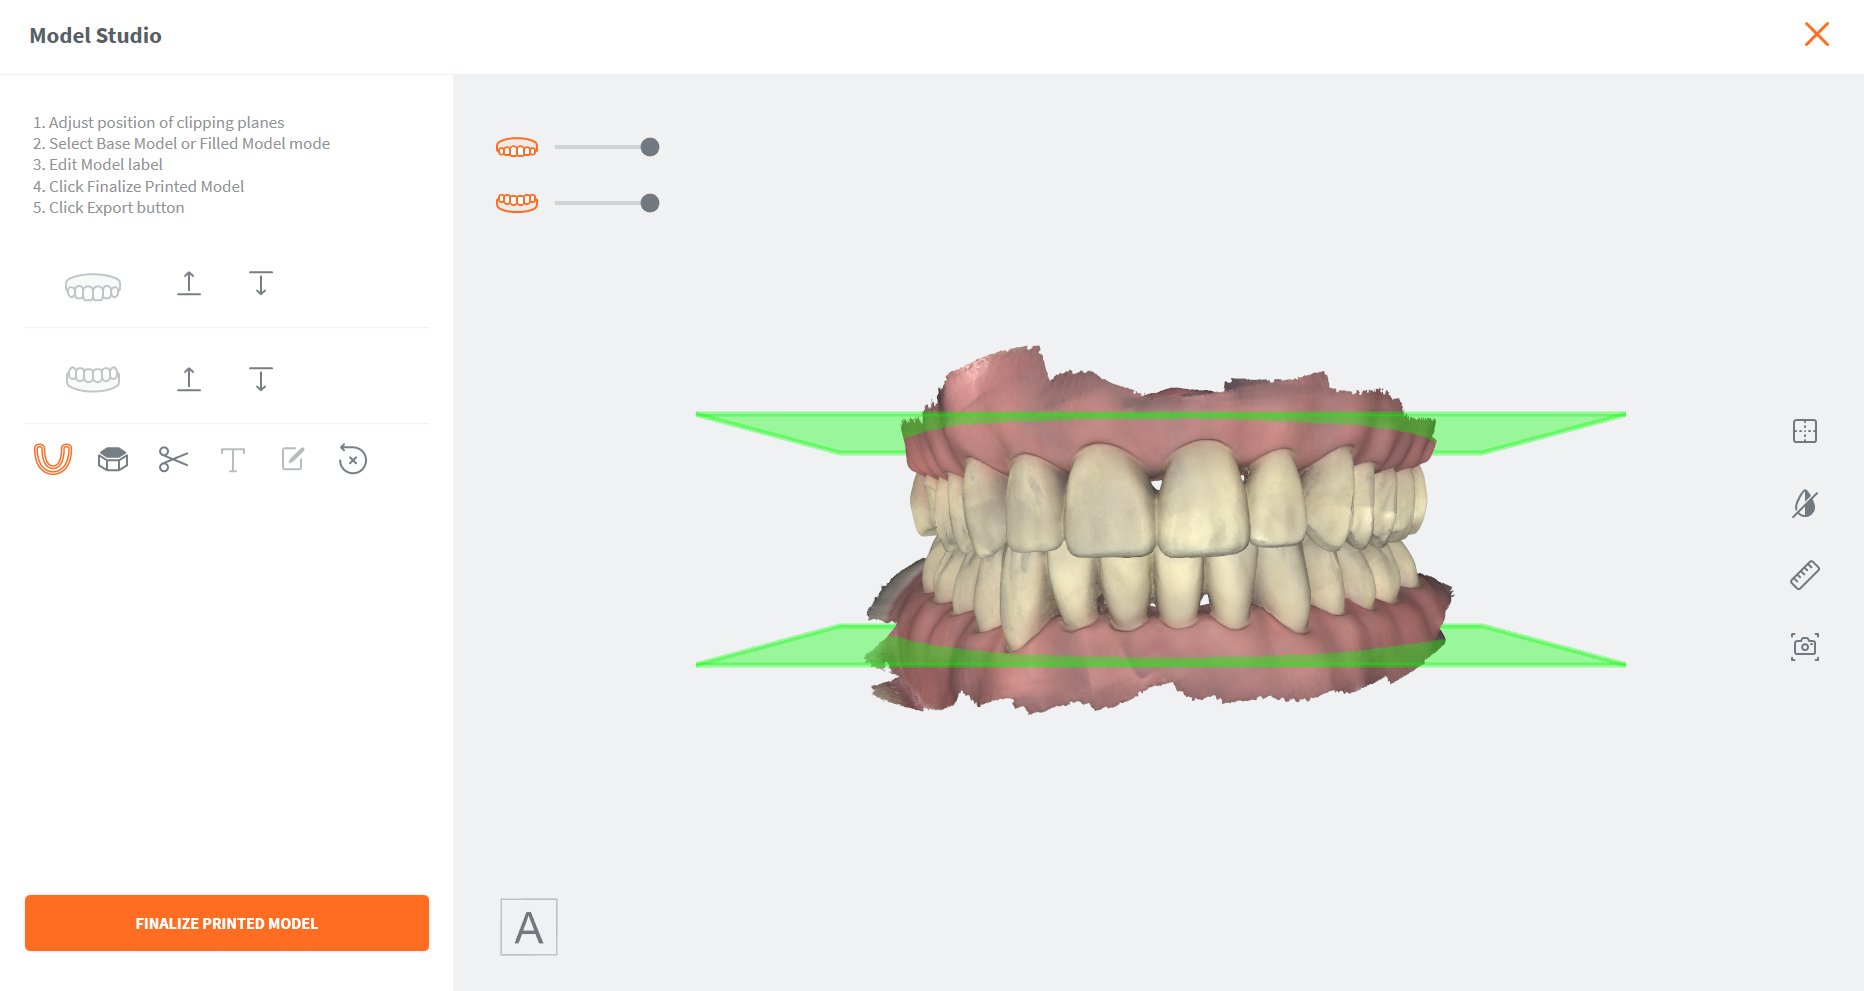
- Adjust the position of the clipping planes to the desired position.
- Select Model with or without Base.

- Select Hollow Model as necessary.

- Edit Model Label as necessary.

- Click the button:Finalize Printed Model
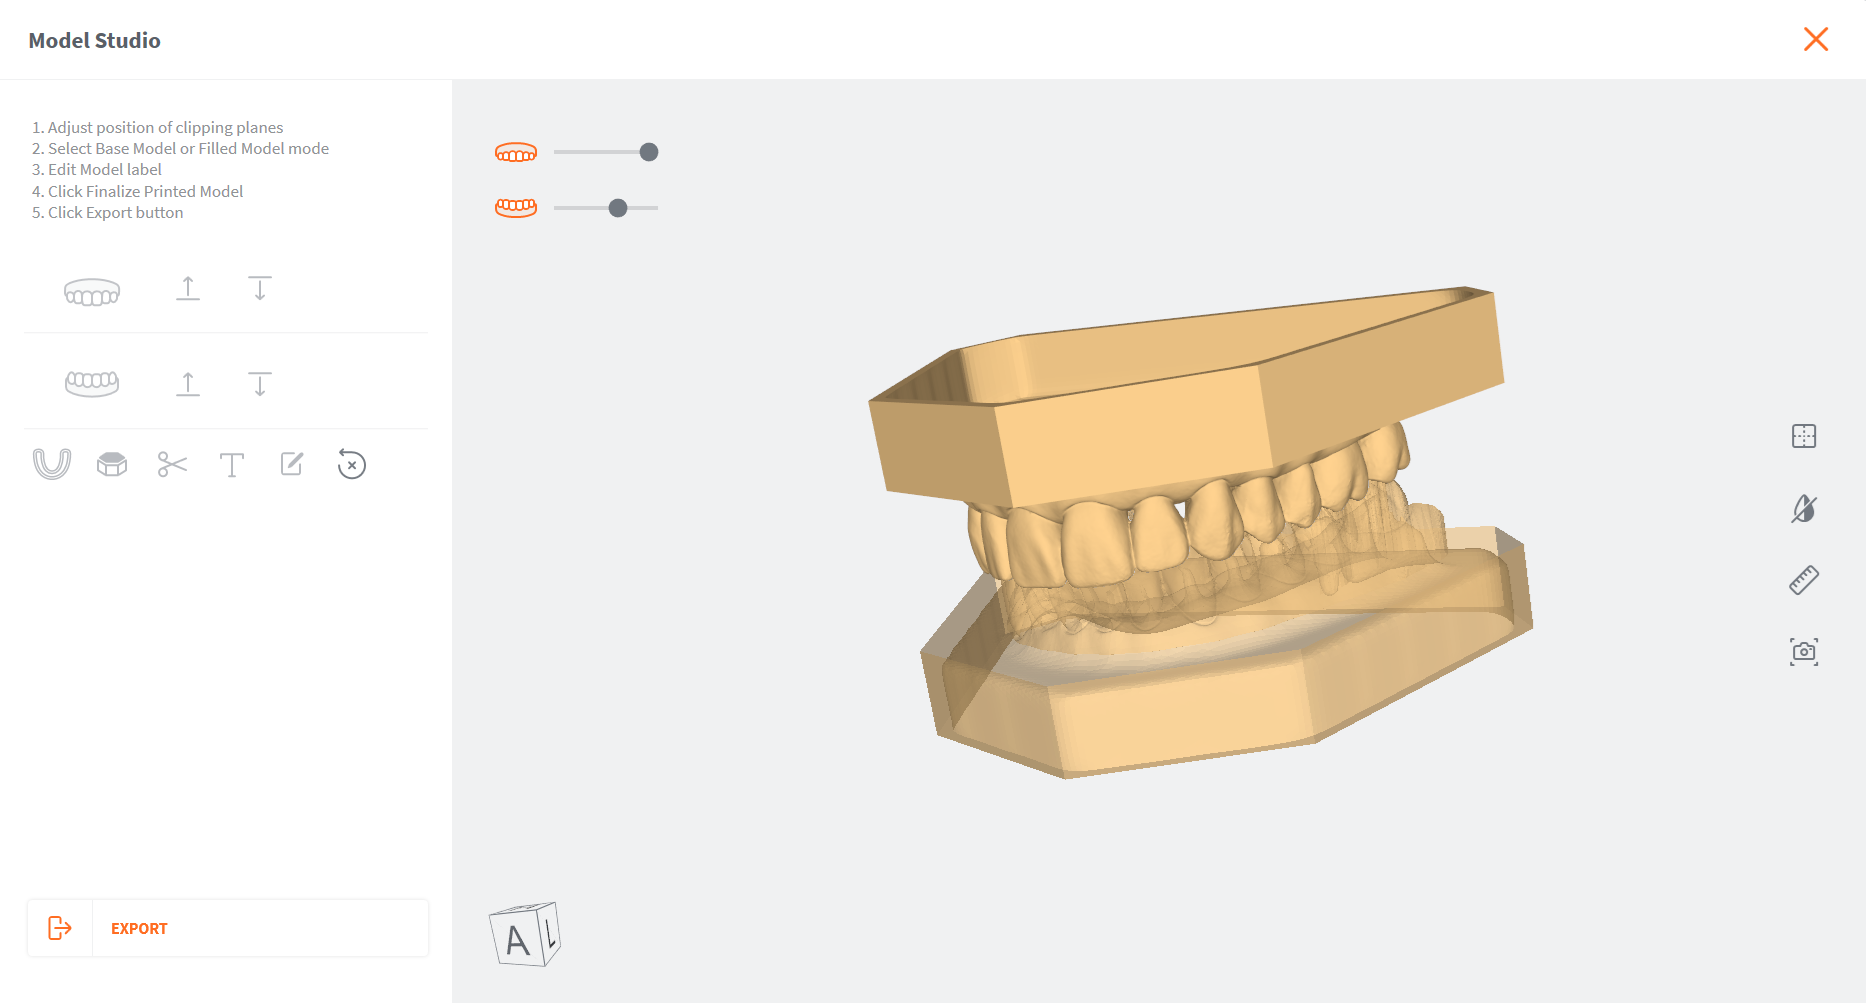
The closed 3D Model is displayed, and you are invited to EXPORT the model files.
- Click Export
- Select or create an export folder, and Click OK.

-
The closed model files are exported in the Case File Format configured in the Case Review page.
-
Click X to exit the Model Studio page.
Available Complementary Tools:
| Icon | Case Review Tool | Description |
|---|---|---|
| Reset Viewport | Re-center the digital 3D model on the screen. | |
| Choose Color Display | Choose between natural captured color, grayscale and bi-color display of digital 3D Model. | |
| Measurement | Tool enabling you to take measurements on the digital 3D Model. | |
| Screenshot | Take screenshots of the 3D model as you edit it. |