Using the Undercuts tool
![]()
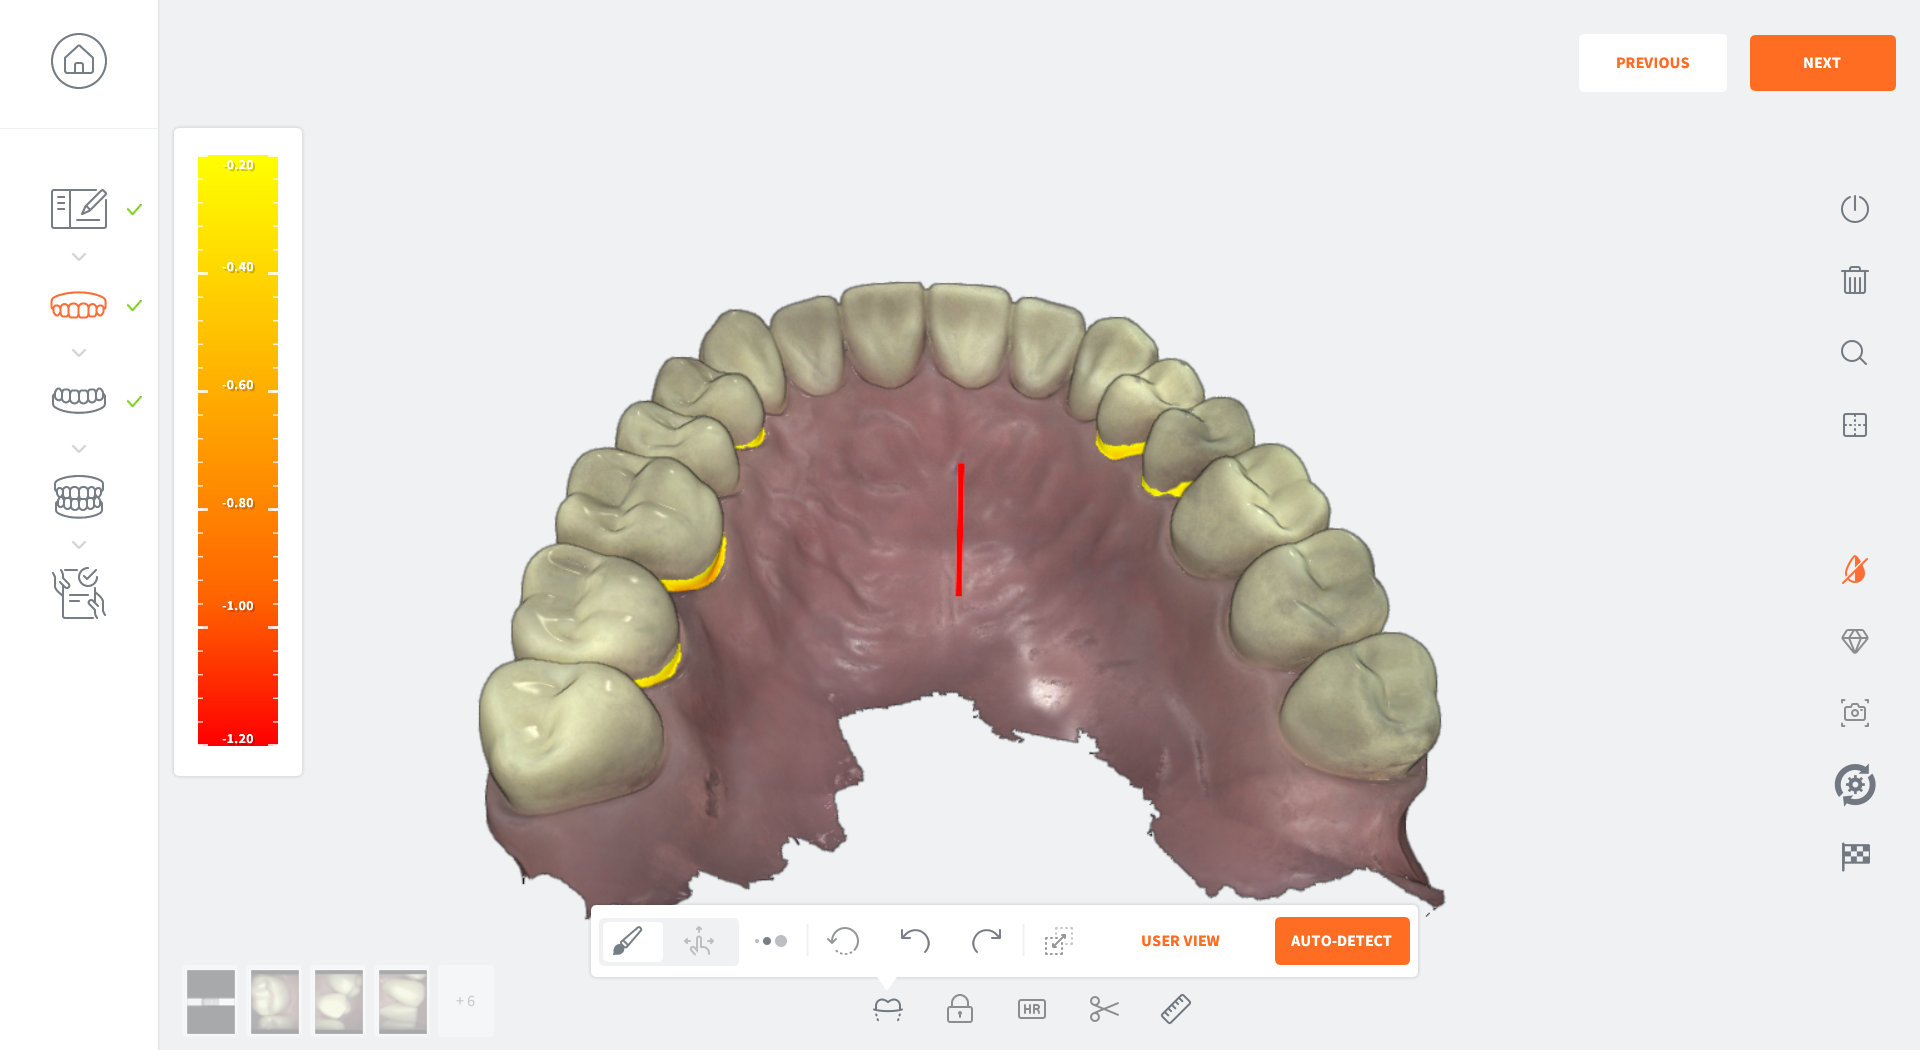
The 3DiscClinic™ Undercuts Tool automatically detects and calculates undercuts on the digital 3D model:
- User View: enables the practitioner to choose the insertion axis that will be used to calculate undercuts on the dental arch
- Auto Detect: determines the optimal insertion axis and displays the undercuts
The insertion axis is indicated by a rod.
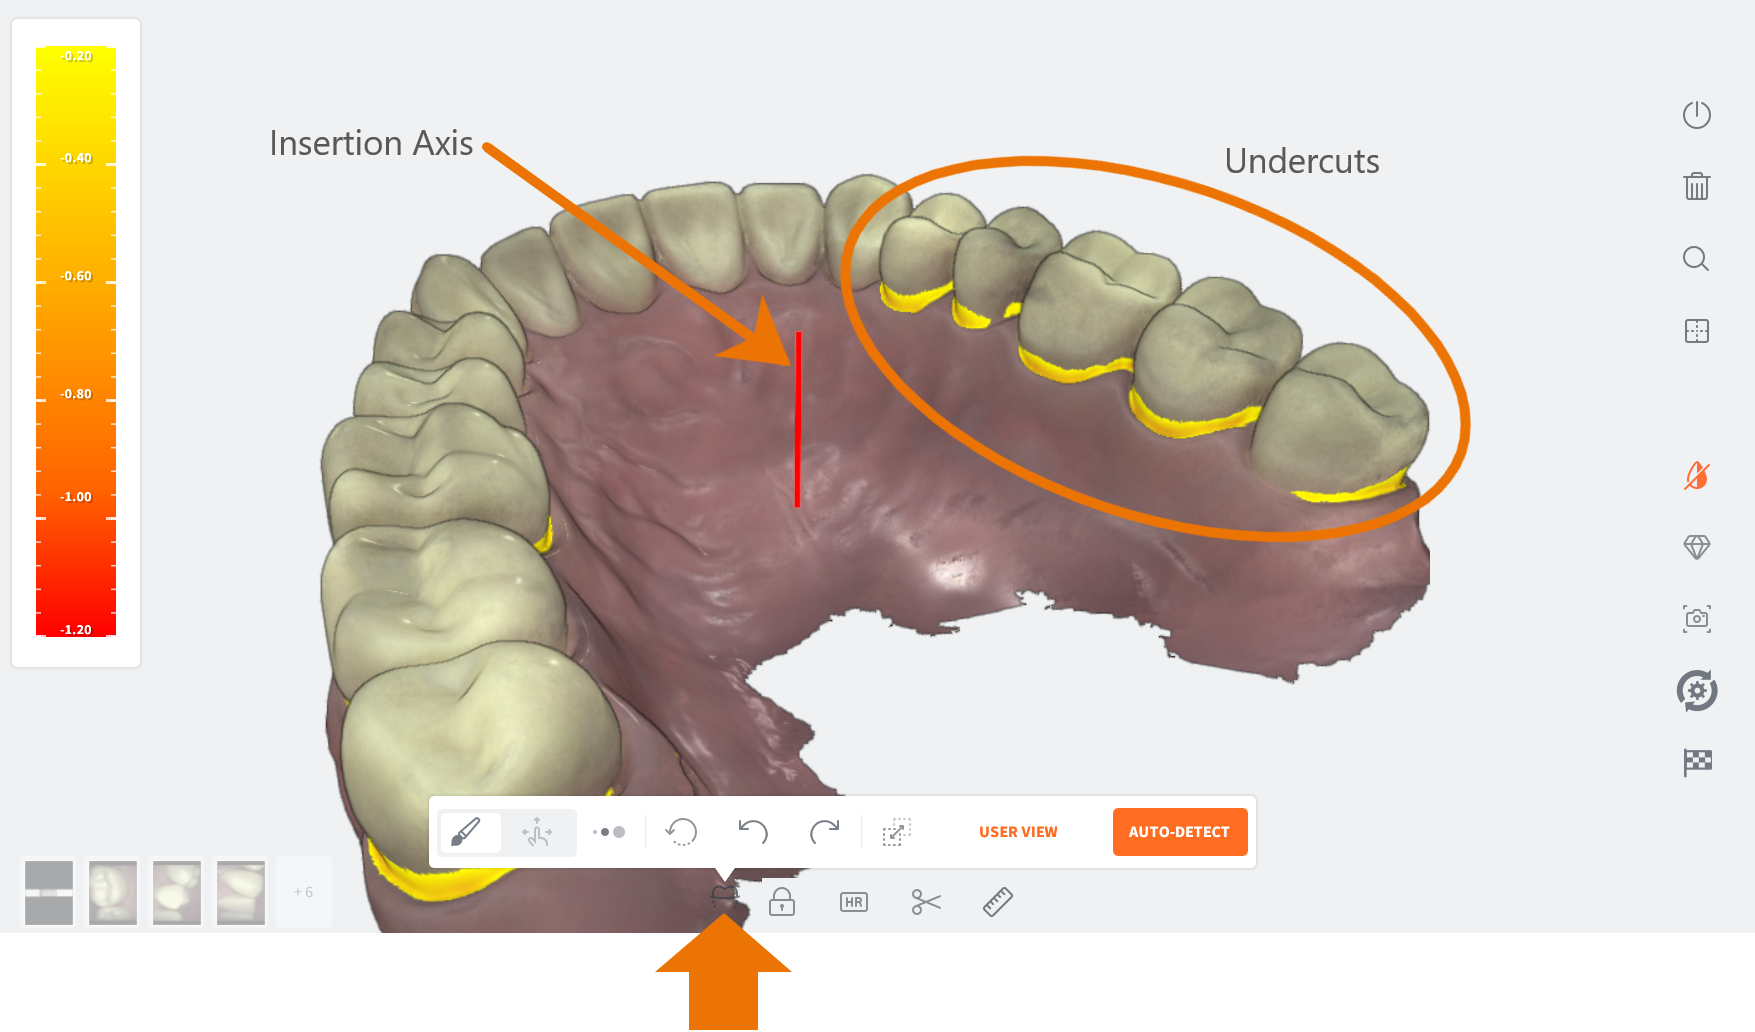
3DiscClinic™ Undercuts Tool
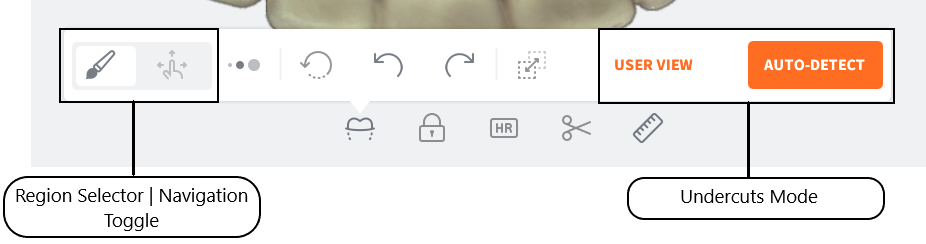
Undercuts Tool: Expanded Menu
To access the Undercuts tool expanded menu:
Click on the Undercuts icon in the Live Scan Tools menu, displayed below the 3D digital model.
Positioning the 3D Digital Model
To position the 3D digital model:
Click on the Navigation icon of the Region selector | Navigation toggle button.
Using the Navigation tool, Left-Click+Drag the 3D digital model to the desired axis of insertion for the restoration.
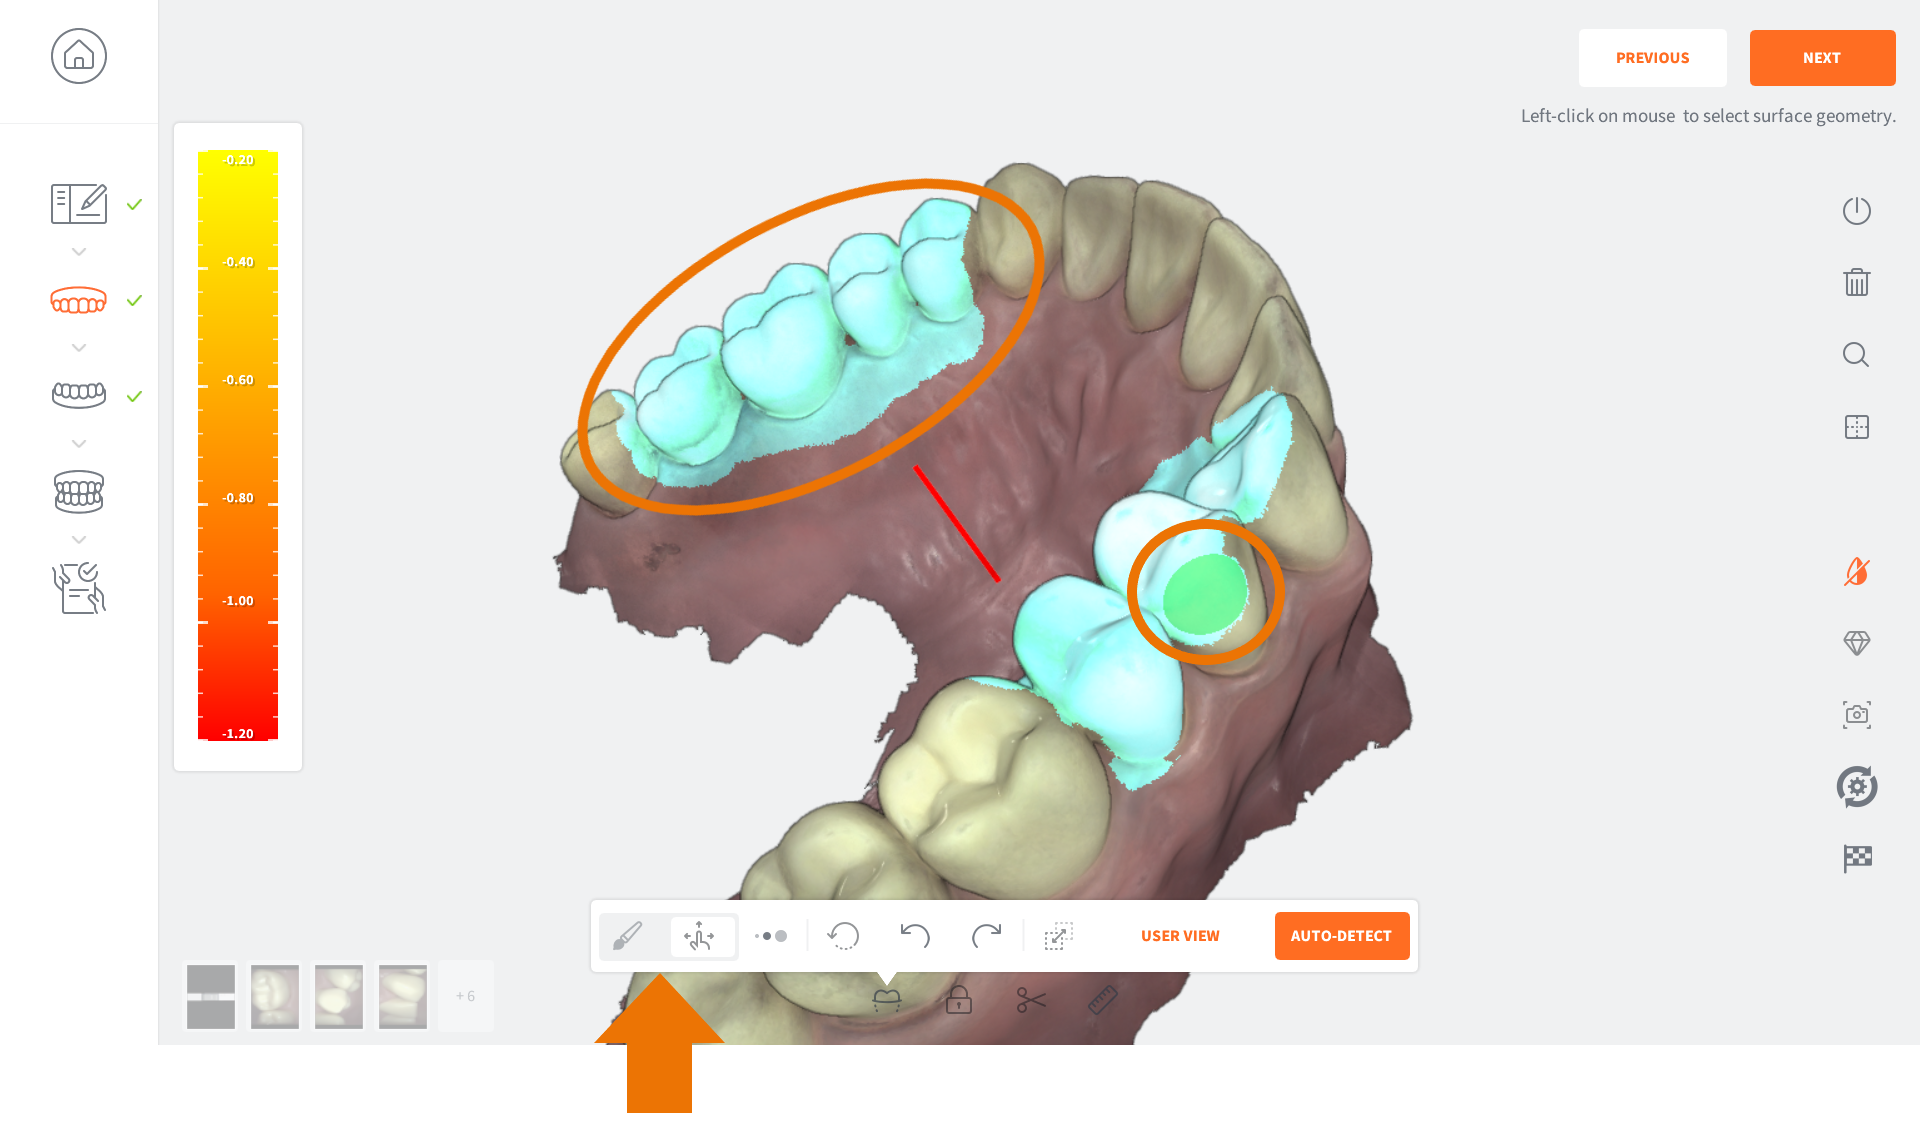
Selecting a Region
To Select a Region for which to calculate undercuts:
- Click on the Brush icon of the Region selector | Navigation toggle button.
- Select the Brush Size in the expanded Undercuts menu.
- Using the Brush tool, Left-Click+Drag to select the Region of interest.
NOTE: You can select multiple regions by repeating the same procedure for another region.
To select multiple regions, select the regions before launching the Undercuts calculation.![]()
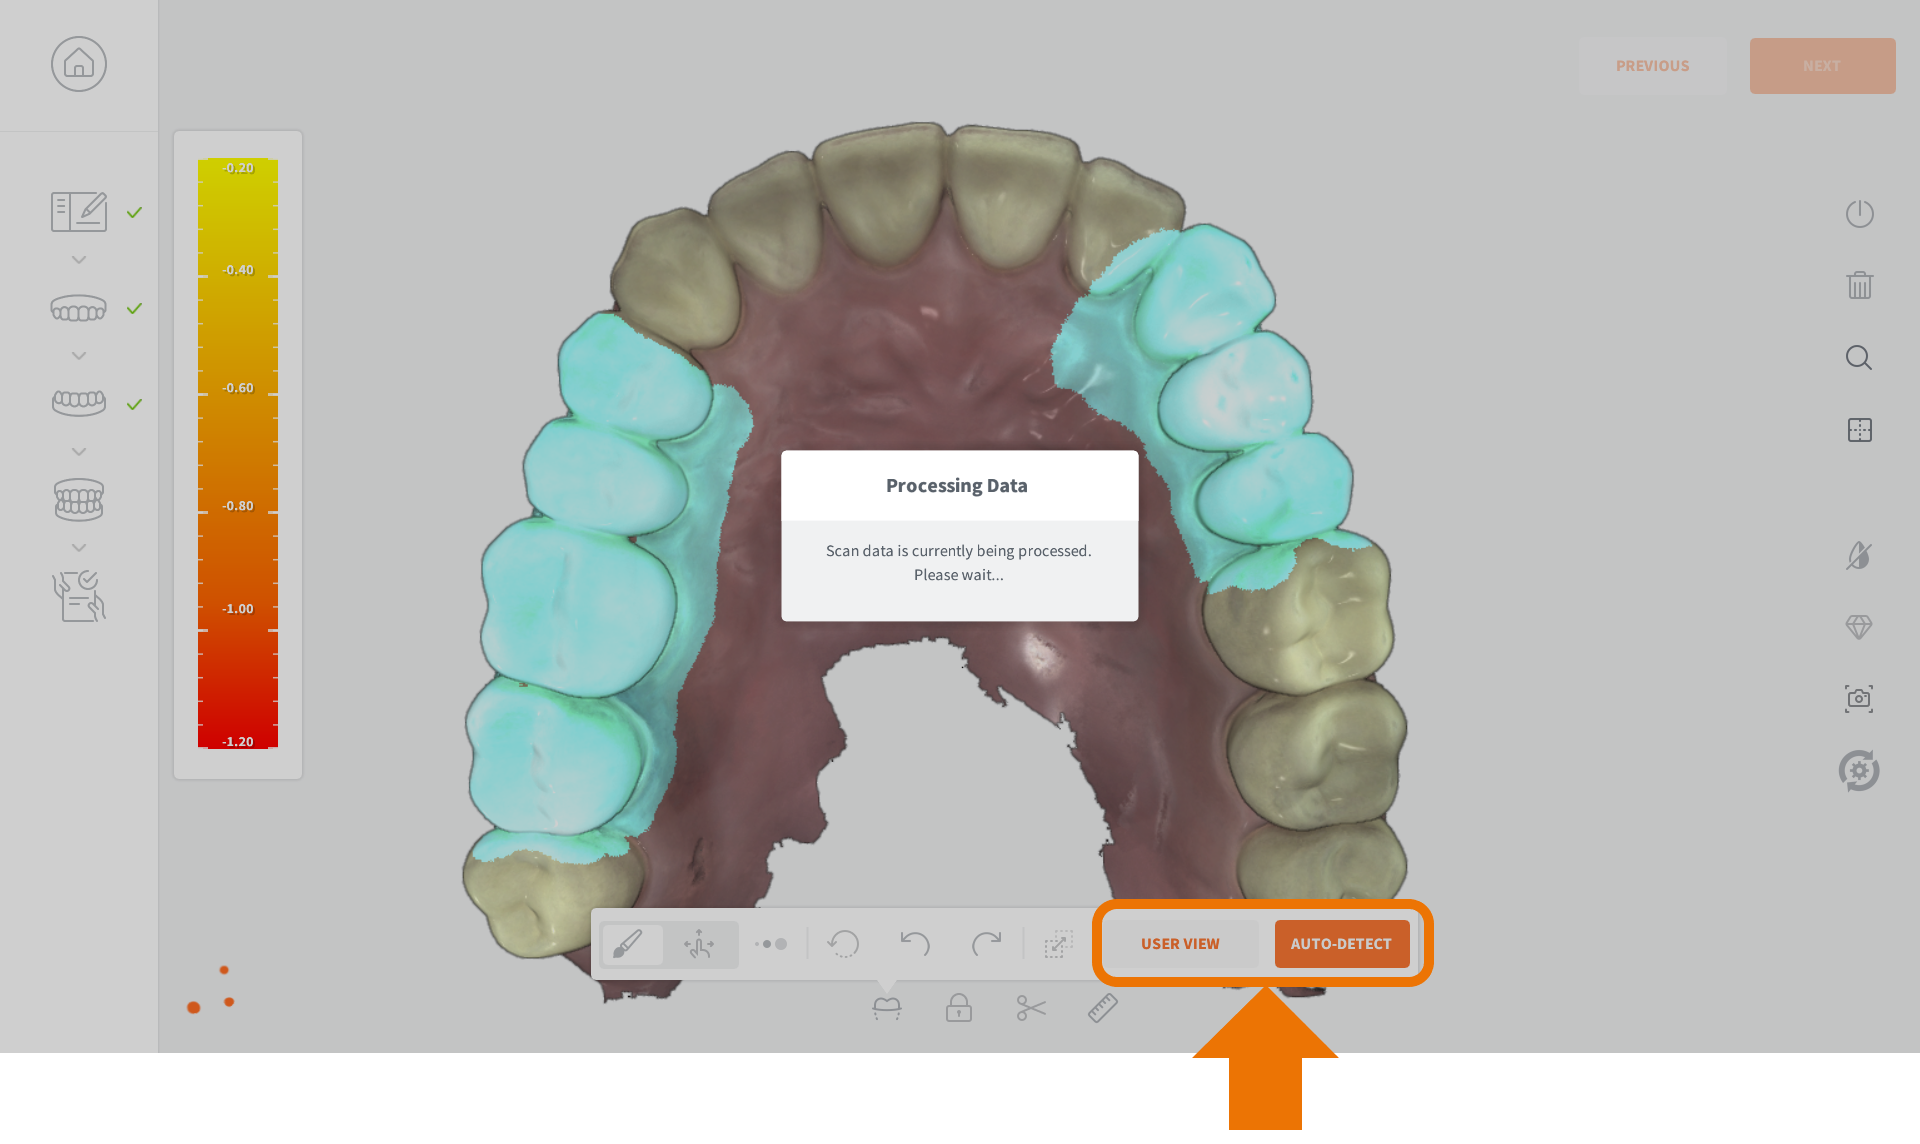
Undercuts: User View
The User View option enables you to choose the insertion axis, used to calculate undercuts on the dental arch.
- Using the Navigation tool, Left-Click+Drag the 3D digital model to the desired axis of insertion for the restoration.
- Click on the User View button.
The Undercuts tool will detect and calculate undercuts based on the chosen insertion axis.
Undercuts: Auto-Detect
To auto-detect undercuts based on the ideal angle for the arch:
- Click on the Auto-Detect button.
The Undercut tool will automatically calculate the undercuts for an optimal insertion axis.
Undercut areas of the scan model are indicated using a color-coded gradient.